In April 2014, we added some simple switches to each Sparkle kit, so we could enhance our craft projects to twinkle based on touch, motion, or sound.
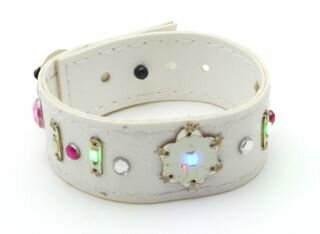
These new kits have all the pieces (except battery) already connected on a single board so you can start experimenting right away.
When you've got your program working the way you want, cut the pieces out and sew unto something fabulous!
The very first time you use Sparkle, it helps to align all the pieces in a row, so the wiring is straight without any cross over.
Later on, you can move things around to make more elaborate designs.
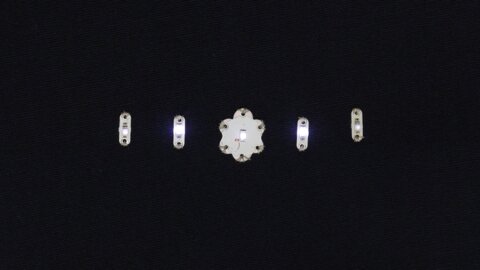
Arrange the LEDs around Sparkle so that the two closest to Sparkle have their + side up, and the outer ones have their + side down.
This is what they would look like from underneath.
Notice Sparkle and the two LEDs closest to it have their + side up. The two outer ones have their + side down.
Cut an 8" piece of thread and tie a knot at one end, then thread into a needle.
Pass the needle from the back side off the cloth through the top + hole on Sparkle.
The + side is slightly bigger than the other petals.
Pull the thread all the way through...
... until you hit the knot on the back.
If the knot goes through your cloth, try again, this time pull gently until the knot barely touches the back of the cloth.
Pass the thread on the outside of the hole on Sparkle...
... and through the cloth.
To make a good, solid connection, it's important to pass the thread 3-4 times from the back of the cloth, up through the hole, over, and back down through the cloth.
Leave 3 inches of thread, and cut.
This will be used to coil into the battery holder.
Do the same thing for the bottom - hole on Sparkle.
From the back of the cloth, through the hole, over, and back through the cloth. Repeat 3-4 times.
Leave about 3 inches extra before cutting the thread.
Hold the top thread (connected to the + hole of Sparkle) to the + of the battery, then hold the bottom thread to the other side of the battery.
Sparkle should light up and start flashing.
If it doesn't light up, make sure
the top thread is not touching the bottom thread
the bottom thread is not touching any part of the top of the battery
wiggle Sparkle and see if the connection improves
This step must work before continuing, so double check your connections
Tape down the + and - thread out of the way as you sew on the other parts.
Each LED board has a 100 ohm resistor built in, and you can mix different colors, up to 20.
This is what they would look like from underneath.
Notice the LED closest to Sparkle has its + side up. The outer one has its + side down.
Connect the top right hole on Sparkle to the top holes on the LEDS. Remember the LEDs are oriented with one + up, and one + down.
Go through each hole 3-4 times for a good, solid connection.
When you finish the outer LED, tie and knot and cut the thread.
No need for any extra thread, so cut at the LED.
Now connect from the lower right hole on Sparkle to the bottom holes on the LEDs.
Look for any stray thread from one hole that might be touching another hole. You can trim, use tape, or fabric glue to prevent the short circuits.
Connect the battery again to see all 3 lights are flashing in order.
When you've sewn all 4 LEDs, the back of the cloth should look like this
Check for stray thread or loose connections
Connect Sparkle to the battery as before to make sure all the lights come on.
The battery holder consists of two round discs.
One has a hole in the middle and adhesive backing on both sides.
The other has adhesive backing on one side.
Peel off the adhesive backing on one side of the disc.
Pass the bottom - thread through the hole in the disc
Place the disc, sticky side down, unto the cloth while pulling the thread all the way through.
Remove the top adhesive backing.
Wind the - thread into a coil. This is the - part of the battery holder.
Press the battery, + side up, unto the coil.
Peel off the adhesive backing off the second disc.
Wind the + thread into a coil. This is the + part of the battery holder.
Press the + disc unto the battery.
And that's how we hook up Sparkle.
If your kit comes with it, you can also attach a push, tilt, or slide switch. Here we'll attach the push switch just like we would an LED.
With a new length of thread, go through and around top hole of the last LED to make a good connection.
Then pass through the cloth to connect to the + hole on the switch.
Also extend the connection from the bottom hole of the last LED to the - hole on the switch.
You could add the switch on the other side too, but either way, you'll be able to temporarily select alternate patterns when you press the switch.
Of course, it works the same way with a tilt or slide switch.
In fact, you can add multiple types of switches in the same circuit.